

For vintage engine enthusiasts, preserving the integrity of classic vehicles involves meticulous attention to detail, particularly when it comes to the cooling system. The cooling system is crucial for preventing overheating, ensuring optimal performance, and extending the lifespan of vintage engines. One of the key components of this system is the water pump, which circulates coolant to regulate engine temperature effectively.
Over time, the water pump can become corroded or suffer from wear and tear, leading to potential cooling failures. Regular maintenance is essential to avoid overheating and potential engine damage. For vintage engines, using the right type of coolant and checking for leaks in the system is critical, as older vehicles often have unique requirements compared to modern counterparts.
Additionally, understanding the composition of the cooling system and inspecting all its components–such as hoses, radiators, and the water pump itself–can facilitate early diagnosis of any issues. By maintaining a vigilant approach to cooling system upkeep, vintage car owners can ensure their prized possessions continue to operate smoothly for years to come.
Inspecting and Replacing the Water Pump in Classic Cars
The water pump plays a crucial role in the cooling system of classic cars, ensuring that coolant circulates through the engine block and the radiator effectively. Regular inspection and maintenance of this component are essential for preventing overheating and preserving the vintage engine’s performance.
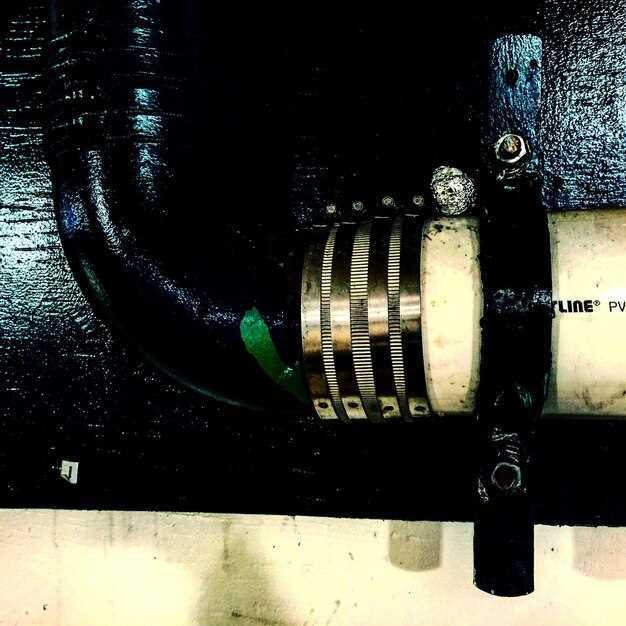
Inspection Steps: Begin by checking for any visible leaks around the water pump. Pay attention to the area where the pump meets the engine and the hoses connected to it. Look for signs of corrosion or wear on the pump’s housing, as these can indicate potential failures.
Next, assess the condition of the drive belt connected to the water pump. A worn or frayed belt can impede proper pump operation. Additionally, listen for unusual noises when the engine is running, as a failing water pump may produce grinding or whining sounds.
Testing the Pump: To ensure optimal functionality, perform a pressure test. Using a cooling system pressure tester can help identify leaks that are not visible during a visual inspection. This test simulates the operating pressure within the cooling system and can reveal weak points in the water pump or associated components.
Replacing the Water Pump: If the inspection indicates that replacement is necessary, begin by draining the coolant from the system to avoid spills. Remove the drive belt and disconnect the hoses from the water pump. Carefully unbolt the pump from the engine block and clean the mounting surface to ensure a proper seal for the new pump.
Install the new water pump by aligning it correctly and tightening the bolts to the manufacturer’s specifications. Reconnect the hoses and reattach the drive belt before refilling the cooling system with the appropriate mixture of water and coolant. Finally, run the engine to check for leaks and ensure that the new pump operates smoothly.
By maintaining and replacing the water pump as needed, owners of classic cars can ensure their vintage engines remain in optimal condition, preventing overheating and extending vehicle life.
Cleaning and Flushing Vintage Radiators for Optimal Performance
Maintaining the functionality of vintage engines requires diligent care, particularly when it comes to the cooling system. A crucial component of this system is the radiator, which plays a vital role in regulating engine temperature. Over time, radiators can accumulate debris, rust, and scale that impede their performance. Regular cleaning and flushing are essential to ensure optimal operation.
Before starting the cleaning process, it is necessary to remove the radiator from the vehicle. This allows for easier access and ensures thorough cleaning. Once removed, inspect the radiator for any visible damage or corrosion. If the radiator shows signs of significant deterioration, consider consulting a professional for repairs or replacements.
To clean the radiator, begin by using a high-pressure water source to remove loose dirt and debris from the exterior. After this initial rinse, prepare a cleaning solution specifically designed for radiators. This solution will help dissolve built-up deposits and prevent further corrosion. Pour the cleaner into the radiator’s filler neck, ensuring it reaches all areas of the unit.
After adding the cleaning solution, it is crucial to circulate it through the radiator effectively. Reattach the radiator to the engine and run the engine with the heater on high. This step allows the water pump to circulate the cleaning solution throughout the cooling system, reaching every corner of the radiator. Allow the engine to run for approximately 15 to 30 minutes before proceeding to the flushing stage.
Once the cleaning cycle is complete, it’s time to flush the radiator. Start by draining the cleaning solution from the radiator using the drain cock, which is typically located at the bottom. After draining, thoroughly rinse the radiator with clean water. This step will help eliminate any remaining cleaning agent and loosened deposits.
Repeat the flushing process several times until the water runs clear. This clarity indicates that the radiator is free of contaminants and prepared for further use. After ensuring that all debris is removed, reattach the radiator to the engine, fill it with fresh coolant, and check for leaks.
Regular maintenance of vintage radiators, including cleaning and flushing, is essential for optimal engine performance. A well-maintained radiator enhances heat transfer efficiency and prolongs the lifespan of the vintage cooling system. Remember that preventative measures, such as periodic checks and cleaning, can save costly repairs and ensure reliable engine operation.
Diagnosing Overheating Issues in Antique Engine Cooling Systems

Overheating in antique engine cooling systems can be a perplexing issue, often stemming from various components failing to perform efficiently. A thorough diagnosis is crucial to identify the root cause and ensure the longevity of the engine. Below is a structured approach to diagnose overheating issues.
Common causes of overheating include:
- Insufficient coolant levels: Check the water level in the radiator and overflow tank. Low coolant can lead to inadequate heat dissipation.
- Faulty water pump: The water pump is responsible for circulating coolant throughout the engine. If it is malfunctioning or has a broken impeller, circulation will be impaired.
- Clogged radiator: Debris or corrosion can accumulate in the radiator, restricting water flow and reducing cooling efficiency.
- Thermostat issues: A stuck thermostat can prevent coolant from flowing into the radiator, causing the engine to overheat.
- Leaking hoses: Inspect all hoses connected to the cooling system for any signs of leaks, which can lead to diminished coolant levels.
- Obstructed air flow: Ensure that the radiator is free of obstructions. A blocked grille or debris can hinder airflow, leading to overheating.
To effectively diagnose the problem, follow these steps:
- Check the water level in the radiator when the engine is cold.
- Inspect the water pump for signs of wear or leaks. Listen for unusual noises during operation.
- Examine the radiator for any blockages or damage. A cleaning may be necessary if dirt or sediment is present.
- Test the thermostat by placing it in hot water to see if it opens correctly.
- Inspect all hoses for cracks or leaks, and replace any that are damaged.
- Ensure that the airflow to the radiator is unobstructed.
Each of these checks will help pinpoint the source of overheating in antique engine cooling systems. Regular maintenance and timely diagnosis can significantly prolong engine life and performance.