

Rebuilding a carburetor can seem like a daunting task, especially for those new to automotive projects. However, with the right kit and a clear understanding of the process, anyone can successfully restore their carburetor to optimal working condition. This guide is designed to walk you through the steps necessary to disassemble, clean, and reassemble your carburetor efficiently.
Understanding the basic components of your carburetor is crucial before diving into the rebuild. Each part plays a vital role in the overall function of the engine, and having a thorough knowledge of these components will help you identify any issues during the rebuilding process. With a comprehensive kit that includes all the necessary gaskets, jets, and seals, you can ensure that your carburetor functions smoothly once reassembled.
Throughout this guide, we’ll provide detailed steps, tips, and tricks to make the rebuilding process as straightforward as possible. Whether you are completely overhauling your carburetor or simply replacing worn-out parts, you’ll find the information you need to achieve a successful outcome. Let’s get started on enhancing your engine’s performance with a well-rebuilt carburetor!
Gathering Tools and Parts for Carburetor Rebuilding
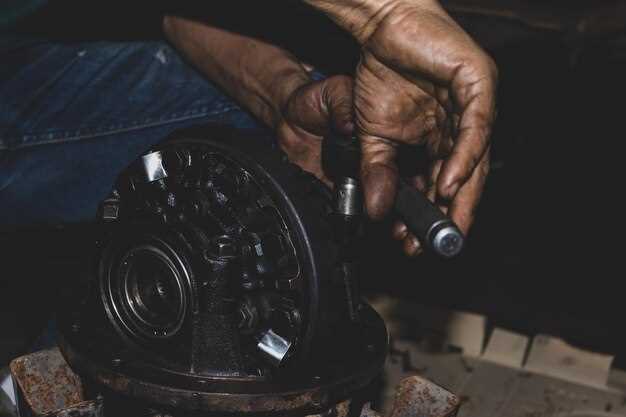
Rebuilding a carburetor requires a specific set of tools and parts to ensure a successful restoration. Start by gathering the necessary tools. You will need a screwdriver set with various sizes, including flathead and Phillips, to remove screws and components. A wrench set is essential for loosening and tightening nuts and bolts that secure the carburetor to the engine.
Additionally, pliers are useful for gripping small parts, while a carburetor adjusting tool can help you fine-tune the air-fuel mixture after the rebuild. A cleaning kit is also critical, as it helps remove dirt and deposits from the carburetor, ensuring optimal performance.
Next, you will need a rebuild kit. This kit typically includes all the necessary gaskets, O-rings, and jets required for the carburetor. Make sure to choose a kit that is compatible with your specific carburetor model. Inspect the contents carefully to ensure everything is in good condition before starting the rebuild.
Finally, having a service manual for your vehicle can be incredibly beneficial. It provides step-by-step instructions and diagrams that guide you through the rebuilding process, enabling you to identify parts and understand the assembly more comprehensively.
Detailed Disassembly and Inspection of the Carburetor
Before beginning the disassembly of the carburetor, ensure that you have a proper rebuild kit that includes all necessary gaskets, jets, and components. It is crucial to work in a clean and organized environment to avoid losing small parts during the process.
Start by removing the carburetor from the engine. Disconnect any linkages, fuel lines, and the air intake. Carefully place the carburetor on a clean, flat surface, making sure to remember the configuration of all connections.
Begin disassembling the carburetor by removing the top cover. Typically, this involves unscrewing several screws or bolts. Pay attention to the arrangement of any springs or levers that may be attached, as they will need to be reinstalled in the same order. Gently lift the cover off, taking care not to damage any components.
Next, remove the float chamber. This can often be detached by unscrewing the retaining screws. Inspect the float for any signs of wear or damage, such as cracks or leaks. The float should be free to move up and down; any restriction at this stage may indicate a problem that could affect performance.
Once the float is removed, take out the needle and seat assembly. Check the needle for any scratches or wear, which may prevent a proper seal. Clean the seat area to ensure that no debris is obstructing it.
The next step is to remove the fuel jets. Use a fine tool to carefully unscrew them, making sure to not strip the threads. Examine each jet for blockages or corrosion. It’s advisable to replace any jets that show significant wear.
Inspect the body of the carburetor itself. Look for cracks, dirt buildup, or any signs of deterioration. Pay close attention to the throttle plate and its shaft, ensuring that it operates smoothly without excessive play.
Lastly, clean all disassembled parts thoroughly using a carburetor cleaner. It is essential to remove any residue that could impact the functioning of the rebuilt carburetor. Before reassembly, compare all components against the new parts provided in your rebuild kit to ensure everything fits correctly.
Once inspection and cleaning are complete, you can begin the reassembly process by reversing the disassembly steps, replacing any worn components as necessary.
Assembly and Calibration Process for Optimal Performance

Once you have cleaned all components of the carburetor and prepared your rebuild kit, you can begin the assembly process. Start by laying out all parts in a clean workspace to ensure that you have everything necessary for reassembly. Refer to your service manual or diagrams included in the kit to understand the correct order of assembly and positioning of each part.
Begin by installing the float valve and seat. Ensure that the float can move freely and not obstruct fuel flow. Then, attach the float arm, making sure that it is adjusted to sit at the correct height as specified in your carburetor specifications. This step is crucial as it dictates how fuel will enter the carburetor, affecting performance directly.
Next, carefully place the main jet and idle jet into their respective ports. Ensure they are secure but do not over-tighten them, as this can damage the threads. It’s essential for these jets to be clean and unobstructed to ensure proper fuel delivery. Consult your carburetor kit instructions for any specific torque requirements.
After the jets are installed, proceed to attach the air and fuel mixture screws. These screws need to be set to the baseline settings recommended in the rebuild kit. This step is vital for initial calibration, and fine-tuning will be needed later during the engine running phase.
Once all internal components are assembled, carefully place the top part of the carburetor on, aligning all the screws. Install the gaskets and ensure that there are no leaks. Tighten the screws in a criss-cross pattern to achieve even pressure across the carburetor base.
Calibration is the next crucial step to achieve optimal performance. Start by attaching the carburetor to the engine and connecting any necessary fuel lines. Once everything is secure, start the engine and let it idle. Observe its operation; if it runs smoothly, proceed with fine-tuning the mixture and idle speed settings.
Adjust the mixture screws in small increments, listening for engine response. If the engine stumbles or runs rough, it may indicate that the mixture is too rich or too lean. The ideal setting will yield a smooth and stable idle. Finally, adjust the throttle response to ensure quick and responsive acceleration.
After calibration, take the vehicle for a test drive to assess overall performance. Monitor how the carburetor responds under different conditions, and make any further adjustments as necessary to ensure optimal operation and fuel efficiency.